24 August 2013

Reupholstering Chairs


Zach built me a table. This is his out-of-jail-free every time we argue now... Anyway, this table is eight foot long and seats ten. He built a bench for one side, but we needed seating for the other six people. Insert inspiration: the Weasley family table, a la Harry Potter.


Take a break and watch some HP, I won't tell.

I love those mix-matched chairs! They're so cozy and boho and homey. Who doesn't want to live in  the Weasley house?! (Answer: Draco)

So the search was on. I don't know if you have this/are aware, but in lieu of Craigslist, our town has a few different Facebook pages that do basically the same thing but are more local and less creepy. I found five chairs, each under $10 from a two different people on our "garage sale" site. Score! I hauled them home and let them "rest" in our basement for most of the summer - I'm lazy.

This weekend, Zach said he didn't want them in his workshop anymore I finally decided to reupholtser them. I'm not nearly as cool as Molly, so I needed them to have something to tie them together - fabric. I picked up six yards of fabric and six yards of a heavy, batting-like fabric (I can't remember what it was called!). I ended up only using three of each kind.

I've never upholstered chairs, but here's my tutorial anyway.

Here's my chair before. Just flip it upside-down and unscrew the seat from the chair. Dearest Husband did this before for me.


Kind of fun to see how it was done before. Somebody must've like lots staples.


I decided I didn't want to rip apart all the old seats. Almost all of them were in good shape and still had good "cush", so I decided to cover it with this white, heavy fabric instead to keep any patterns or color from showing through. I did have to take apart one that was in bad shape, but I still followed the same basic pattern. I just laid the seat face down on the fabric and freehand cut around it, making sure I had enough to cover the edges.


Next, I pulled it tight and used my staple gun to secure it.

 I then pulled and stapled the opposite side.


I did the same thing on the other side, making sure the corners looked like this. I think it looks like an ear.

This is how all four "ears" look.

Take some time on this step to carefully fold the corners so you have neat folds. I also need a manicure.


Once you like the corners, secure them with staples. Because I still have the old fabric underneath the staples don't want to hit the wood. If you apply extra pressure to the gun with the heel of your hand, the staples will almost always hit wood.

Here's  all the corners stapled down, but it's pretty messy, So I trimmed it.

Trimmed!


Here's what it looks like with the first layer finished - nice and tight with clean corners. I know they're not professional quality, but they look good to me! Next, repeat the same steps with the patterned fabric.


Tah-da! finished chair. Looks so much nicer than before. I've been in love with this fabric for a long time, so I'm glad I found something to use it for!


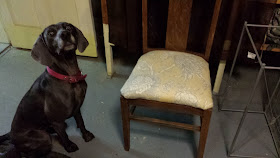
And of course, Lady Lunatic wanted a picture too. Crazy eyes!

I have a thing for side-by-side before and afters.


Below are a few shots of the chairs in place. I love the way they look and the fabric that ties them together. We even had an extra, so I put it in the corner. My favorite is the yellow mid-century chair and the rose-backed one is Zach's favorite. Which do you like best?


04 August 2013

Big Guestroom - 1 Year Update


When we first moved in, we referred to this room as the "blue room". The radiator had been painted (or maybe the other way around?) to match the light, baby blue carpet. If you'll remember, the first thing we Zach did on day 1 after closing, was to remove every scrap of carpet from the house, including every single stitch of the blue carpet.


This room also has some incredible views. Both windows have a view of the lake - pretty nice to wake up to. We're a little jealous that it doesn't have the master closet, we'd love those views!

 Earlier, I did a post about my inspiration for this room, and I still have a lot to do to finish it. But hopefully you can see some of the inspiration played out.

Check out my rope lamp! It's probably my favorite part in this room. I got it for a dollar or so at an auction, the same place I got the one for the little guest room. I used some inexpensive rope from a Walmart and a glue gun to make it nautical. I've also gotten a cute piece of coral from target. The dresser is awful, I admit it. I just can't decide what to do with it. I'm tempted to paint it, but it is pretty nice looking wood. Maybe I can just switch out the pulls with something like these


I'm totally in love with this wall color too. Zach did it while I was gone because I was too nervous to go that dark! It's called Sailor's Coat and that's exactly the feel of it. It feels really modern and cozy. The bookshelves are temporary. They're Target cheapos we got for our wedding and after 3 moves they're in rough shape. Zach has a plan to build in some bookshelves to match the radiator cover. I'm picturing something like this.


The beautiful brass bed is a family piece of Zach's. I have to say I didn't like it when we first got married, but now I love it! The gold pillows are there because I haven't recovered them yet - no style choice. We also need some side tables. I want something spindly that reminds you of a ship. I sewed these curtains too. I like them, but I lined them with a grey fabric that makes them look green in the sunlight. It's odd. All the bedding is from Target except the quilt underneath. We got a great chenille bedspread at an auction for just a few dollars. I love the texture and old timey feel of it.

And finally, a few "we-done-it" side-by-sides:


So, what's left in here?

  • Rug
  • Side Tables
  • Wall Hangings
  • Light Fixture
  • Recover Pillow
  • Build radiator cover and bookshelves


02 August 2013

Dining Room - 1 Year Update


I love the idea of a formal dining room. I'm an old lady at heart. I have visions of Thanksgivings, Christmases, family dinners, game nights, bible studies, and dinner parties. I love finding beautiful china and mix-matching pieces. This huge open dining room space was part of what sold me on this house.

But look at those floors! They were awful! Here's our theory: At one point the floors were beautiful and new. Then, someone took large area rugs and glued them, with bionic, tar glue, to the middle of the floors. Then, someone ripped up those and tacked down carpet. If you look carefully, you'll notice our floors all have lines about two feet from the walls where the planks slightly change color. We think the glue permently affected the color. However, 80% of the time it's not noticable. But hey, they're almost 100 years old and are supposed to tell a story.

Here's a view of the original posting photos from about a year before we purchased the house. I actually don't mind the funky wallpaper, but judging by the rest of the house, it probably wasn't in good shape close up.

117 W 1st St, Storm Lake, IA 50588

Zach worked hard and refinished these floors. They were some of the last he dd and his new-found experience made them look really nice!


We also had the whole issue with the beams. They were falling down and I was having visions of it killing a whole dinner party of guests. Definitely not irrational. It was the only project we've hired out so far, because it looked scary. Turns out it was stupid easy, you can read about it here.


Now, I've been slow at collecting furniture for my dining room because I want it to look perfect. I picked up the buffet a few months ago off of Craigslist and I love it. It has a great 30's vibe.

That black shelf is definitely temporary. I'd love to find a huge, glass, dark, hutch to house my excessive collection of china. I'd also like it to only cost about $50... maybe that's why I haven't found one. I'll hold out. The kitchen tables and chairs are the ones we had in my house growing up and hold some sentimental value. Zach built us a gorgeous family table, but the last coat of poly didn't dry in time to make it into the 1 year pictures. Now I need to find a special place for the table in the picture.


The paint color on the top of the chair rail is called Charcoal grey and I love it. It's a little daring, but nice. The color on the bottom is supposed to be a light grey, but it has way too much blue in it. I read somewhere that adding blue to the room will make the walls look more grey. I think the blue from the window light proves it in this picture! You'll notice I still have no curtains. I've finally picked out some awesome blue geometric patterned fabric... I just need to order it. Zach will be building a radiator cover in here as well, so I think the curtains will have to be shorter length instead of the classier full length style. What do you think?

So what's left?

  • Radiator Covers
  • Paint ceiling
  • Sew curtains
  • Buy/Refinish a hutch
  • Build a table
I only have one side-by-side for this room because I only took one before. But it's delightful.


In case you were wondering, I still hate the wild-west door, but apparently it's original. Sooo blah.

01 August 2013

TV Stand in Place

Again, about a thousand three months years ago, I did a series of posts about re-purposing, refinishing, and completing our entertainment center. It's finally completed and in the right space!


We still need to mount the antenna and find a few knick knacks to set it off. Zach spent a very frustrating afternoon installing those floating shelves. One of them may or may not have glue to hold it in place, whoops. We got them on sale at Michaels (I think) and they totally match the trim throughout the house, so they look like they belong. Despite our awful time at installing them, we bought another floating shelf for the little bedroom. They just look nice!

I love how it perfectly fits in the corner and that it's out of the way. When someone comes over, I don't want them to see a big TV first. I think the focal point of our front room should be a comfy conversation area and a welcoming dining room table - and now it is! It makes a great focal point in our tv room and the color of the stand pops against the dark grey walls.