17 May 2013

Big Guest Bedroom Inspiration Board

I wanted to share my design inspiration board for the Big Guest Bedroom with you all - and Zach. He refuses to get on Pinterest. Apparently it's all too girly-girl for him. I'll eventually convince him otherwise, never worry. To get you (and him) to see what I see, I created an inspiration board.

Now, I've always been wary of being too themed. I don't want to get kitschy. However, my fear of theme has always led me to tans, browns, and other boring, staple pieces. That boat stops here. Our Big Guest Bedroom has two pretty awesome views of the lake and I want to play on that. I think a nautical theme will be a fun change of pace for us and our visitors. Let me know what you think - is it too intense or cliche?

Oh - and just imagine this all with our very vintage brass bed.


  1. Floor Length White Curtains - $95 at Overstock
  2. Dark Blue Walls - Style Inspiration at House to Home
  3. Large Vintage Coral Piece - $125 at Etsy
  4. Coral Dresser - $800 at Cottage Home Main
  5. Whimsical Nautical Print - $54 at Etsy
  6. Small Coral Pieces - $38 at Etsy
  7. Grey & White Striped Rug - $300 at Crate & Barrel
  8. Candle Lanterns - $27 & $36 at Kohl's
  9. Rope Lamp - $369 at Lamps Plus

A few beauties didn't make it on the board, but are still in my mental design:
Pine Cone Hill Rosary White Quilt | Gracious StyleHunter 52-in Allegheny New Bronze Outdoor Ceiling Fan with Light Kit
White textured quilt - $414 at Gracious Style
Grey/Brown Rattan Chair & Cushion - $559 at Crate & Barrel
Fan & Light - $169 at Lowe's

Now, will I really spend over 2,000 on just a chair, rug, quilt, and dresser? No. I'm cheap and poor - a helpful combination. I will be looking for lookalikes and DIY projects, but I do adore the designs. What will I really buy? Probably that whale print and the fan. Oh, and I already bought the paint - it's called Sailor's Jacket. How wonderfully perfect for the "theme"?

15 May 2013

World O' Carpet


I picture someone and something like this in our house...
Like any good story, we should start at the beginning. Once upon a time, 1919 to be exact, our house had beautiful floors. The planks were thin and delicate, the wood fine, varied, and unique. Then, I'm guessing around 1960, someone decided that wood was passe and glued down rugs or carpet to said beautiful floor. Again, someone, acting out of good intention I'm sure, in the 70's decided to staple down green shag - yes we've found the evidence. This cycle continued until 2012 and until the house had no hardwood floor visible.

Stories like this make me sad. First of all, because I am allergic to everything - dust, mold, cats, dogs, shrimp, horses, pollen... you get the idea. I take daily allergy pills (bought in the 300 pill economy bottles), but even then I'm still attacked, which brings on my asthma. I should live in a bubble, I know. The point being, carpet makes me sick - literally.

Secondly, stories like this also make me sad because I like hardwood. Zach likes I like how easy it is to clean. I like how easy it is to switch it up put a new trendy rug on it. I like the array of colors in natural wood. I like the stories that the dings, scratches, and imperfections tell. I like the warmth and richness it brings to a room. I like that it is classic and never looks outdated. I like that it doesn't make me sick.

When we bought our house, the kind realtor had torn up all the old carpet except for on the landing and "the blue room" (i.e. the big guest room). The potential for hardwood floors throughout sold me. We Googled incessantly, questioned the people at Ace, and watched almost every YouTube floor refinishing video available. Finally, we decided we could totally refinish the floors - all 1300 square feet - with no experience.

Before moving in, we figured we could get it all done in about two weeks. That was stupid. We were tired and busy. It's May (301 days past closing - I have a count-up widget on my phone, sue me) and we have the tiniest bedroom and the craft room done. Either we suck at this, or it was much harder than we thought. Probably a combination of both.

Sleeping Porch
Little Guestroom
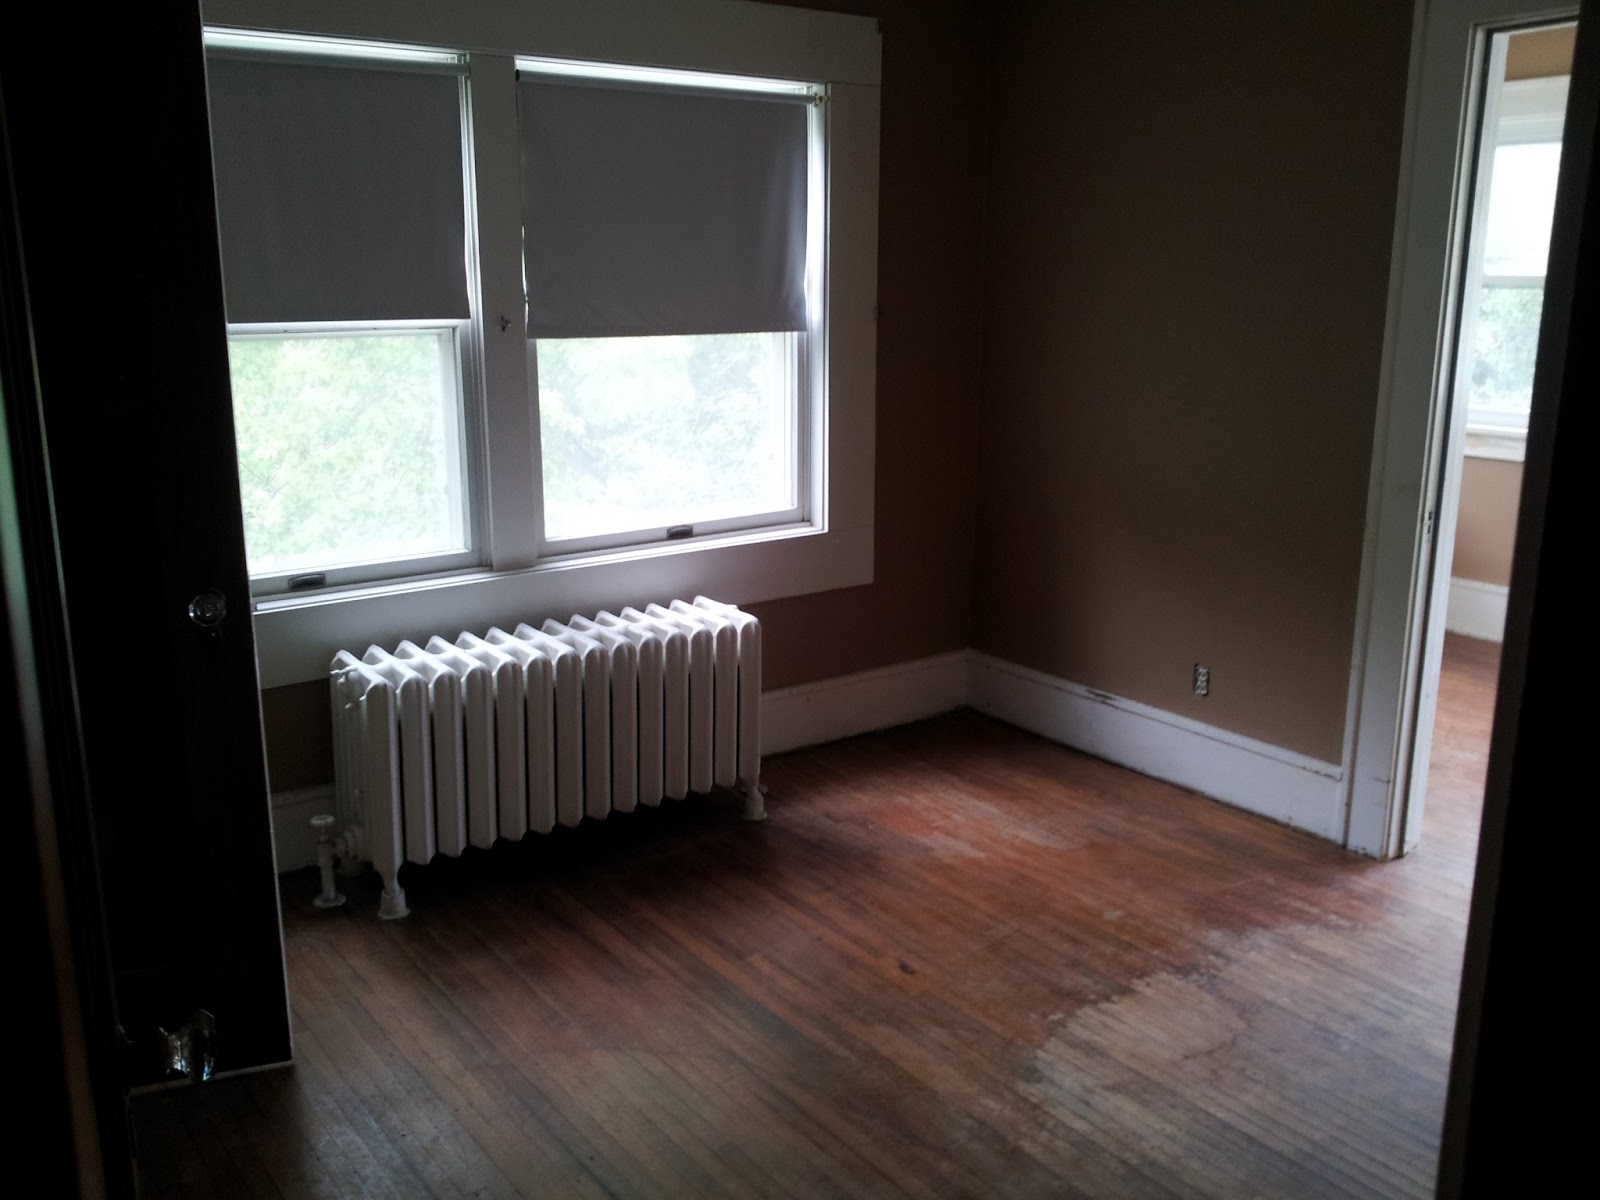
Anyways, we decided to start up in the little guest room and sleeping porch. We figured it would be better to make learning mistakes - can you tell I'm a teacher? - up there than to do it downstairs where everyone would see it. In case you forgot or don't want to click back, here are the rooms before we started.

 Burlap Toms! Christmas
present from the hubs.
Zach started by renting a big floor sander and going at it. He also used a combination of different handheld sanders. This is what it looked like when it was finished... with a Tom's shot for good measure.

I felt like a ballerina on the sanded floor - I may have even danced a little. It was so smooth and natural. We decided not to stain them. We liked the way the natural wood grain looked and we didn't want to add that extra step. We also didn't want the stain to bring out any more imperfections. Our floors are 100 years old and have nails, screws, dents, separation, and more. I like the story they tell and their imperfections, but I don't want to bring your eye to them first.

Oh, and we painted after we sanded. This was dumb because I'm not good at painting slowly and carefully. So then we re-sanded some parts. Live and learn. But I love that color - perfectly grey without being blue! Yesss.

Then, we cleaned everything. The dust is insidious, evil and everywhere. Did I mention I have bad allergies? This made it worse. Once it was all clean and an ungodly hour of the early morning, we decided to begin putting on the poly. We used Minwax Satin. I had heard that using a higher gloss can make imperfections stand out more. They also said that scratches tend to be more visible with higher gloss. We're happy with our choice.
Seriously look at that paint color and trim... <3 
The poly totally brings out the color of the wood. It was incredible... and smelly. Keep other doors closed to keep the smell out as much as possible. We let it air out with the windows open too. Again, wasn't great on the allergies.

Zach let the first coat dry for about 12 hours. He used a high numbered sand paper (I can't remember what) to buff it down and applied the 2nd coat. Since this is a room that we really don't use, we let it sit for a few days and a weekend after applying it to really cure it. Okay, lets be honest there is still only a rug and some bags in the room because I can't decide on furniture.

I spy a sewing machine, some freaky long toes, morning sunshine, and a bunch of
Walmart bags filled with supplies for my craft room!
There are definitely some whoopsies on the floor - a few spots where the poly puddled or dripped - but unless you've spent a long time staring at these floors you probably wouldn't notice. The not shiny spot is actually a just dusty footprint... the dust continues permeate as we work on other rooms.

We're pretty happy with it and feel that it will make an great future nursery. We'll do another post when we're finished. Have any hardwood floor refinishing stories or tips? Share them with me!


13 May 2013

Beam Me Up!

Ignore the plaster dust on the after, it isn't permanent! Oh, and the awesome popcorn texturing...


Our house has decorative beams in the dining room and living room. They're pretty unique - we hadn't seen anything like them in any of the houses we'd looked at. 


Can you see them up there? These pictures are from our home inspection, so I wasn't really focused on the beams - sorry!

There was one little catch to it all though, they were falling down. Yep, falling down. The dining room ones were worse, probably because of the light fixtures. And in the nine months we lived there they were getting worse.

Can you see the sizable gap?
It was slowly growing.


It was to the point that I was terrified of sitting in the dining room for fear of being clobbered by the beams. Every time we left for the weekend, I had paranoid visions of them falling down and crashing through the floors or window. It was time to do something.

The hubs did his best to try to figure out how to fix them, but he couldn't figure out how they were put together, but we did know they weren't solid - so the chance of death was lessened. We Googled every key term we could think of, but apparently no one has ever posted about beams like this online. So I will.

Because we're in a new town and don't know who is reliable for repairs, I returned to Google. I found a local carpenter and we had him come out for an estimate and he quoted us $100. I was so excited to have them fixed I agreed. Zach watched him fix it and he used a long 2x4 to hold it up and long screws to screw them into the joists. Apparently they had originally just used finisher brads and nails - it was surprising they had lasted the last 94 years.

Fixed! (and painted!)

Now that we know how easy it was, it definitely wasn't worth $100, but I'm glad they're done! The carpenter did think that they were original to the house (along with the tassel lights). He said that they were probably built onto the ceiling, which is why we couldn't figure them out.

Ignore the bad patch, it isn't from us! We will fix it eventually.
On the left are the beams in the living room, and on the right is the beam in the dining room. The center is the wood on the doorway between them. Weird that they're different right? We like them though, they add a lot of character and style.

12 May 2013

Flowers, Sunshine, & Water

The view from our bedroom window this beautiful Sunday evening, and I'm inside painting...

Sneak Peak Sunday

We went to an auction a few weeks ago - it was amazing! An antique store, that was three stories tall, was downsizing and auctioning off almost everything. We got quite a few gems, but since there are many Sundays, I'll just share one.


Check out those beautiful french doors! Their dimensions should be perfect for our door way. Oh, did I mention how much they cost? FIVE dollars. That's right, five!

I'll post posting about their refinishing job soon. Stay tuned!

11 May 2013

Dresser to TV Stand Reveal!

I know you've been eagerly waiting for it. What does this wonderful TV stand look like? Well... here you go! It's a little brighter in real life.


We are pretty excited about it at our house. It's one of our first statement pieces to break up all the simple tan and brown furniture staples. My husband even likes the finished color - which is something I was worried about, I thought it might be too girly!

If you missed the beginning posts, click the links to read about the original and the first steps of the transformation. Beware, this posting is pretty picture heavy.

After one coat of primer and three - count 'em three - coats of paint I waited over night for it dry. This was hard for me... I'm impatient! The next day we did a Menards run and picked up some new knobs.


They were a steal! I had a hard time imagining spending 3-5 dollars per pull on a dresser that was free, especially when I needed 12 pulls! Did I mention I'm cheap? The hubs and I both decided we wanted something darker but with some interest, and these copper and black pulls were perfect. They were .68 cents a piece but there was a 15% off sale. Score!

See? Not kidding.

It's important to look intense
while using the drill.
Once we got home we measured out the drawers and marked the center. I watched this handy YouTube video. I extended the lines to make a big "X" in the middle and then measured 1 3/4 inch from each side of the center because our pulls were 3 1/2 inches. If you remember, I used the wood putty to fill the original handles on the side drawers, but left the center knob holes intact. So based on my marks the hubs drilled out the new holes and screwed in the handles.


Next, we needed to cut out some squares in the back of the empty drawers to thread the wires in. I sketched out the size of the box on the inside back. I wanted it to be big enough for a three prong plug, but not big enough that you'd see it while watching TV. I drew it on the inside so I could be sure my spacing was correct.

If you squint you can see it.

Next, we drilled a hole into each corner to have an outline to cut from on the back. We used a small bit because I didn't want to splinter or split the plywood, but later we used a bigger one and it was fine.


Next we tried to jigsaw out the squares. This proved to be more difficult than it should have been because our jigsaw apparently has only the murderous-violently-shaking speed. So, in actuality we used a mini hacksaw and the jigsaw in combination.


After the holes were cut out, we sanded them down, vacuumed out the debris, and touched up the paint. In retrospect we should've cut the holes before painting - oh well, live and learn.

Finished hole
Next, we carried the dresser outside from our basement, around the house, and into our front door, at about 10PM, looking like thieves all the way. Our basement stairs have too steep of a turn for the dresser, so taking it outside was just easier. You probably won't have to do step though, but you certainly can if you'd like to make your neighbors wonder about you even more.

Finally, we untangled all the TV wires - why are there so many?! - and set it up. Lets take another look at the finished project shall we?


I love the curved pieces on the dresser. It adds some sophistication and fun. I think the pulls pop and give the cheery color some depth. Ignore the fact that the TV is in front of a window. It will only live here until the den is done (note the unfinished floors and phone wire popping out of the floor...) - maybe another week? I'll post an updated picture when we get it moved into place.

Oh and let's not forget the final cost of this "free" dresser:

  • 1 Gallon of Primer - $15 (still have 3/4 left)
  • 1 Gallon of Paint - $22 (still have 3/4 left)
  • 4in Trim Roller - $5
  • Roller Pads - $4
  • Paint Brush - $3
  • Knobs & Pulls - $8
    Total Cost: $57

Not bad for a custom, substantial piece of furniture!

I've seen some cute ideas of how to accessorize it like these:
SONY DSC
From How Does She
Pinned Image
From Project Palermo


From Two Twenty One
From Craftify It
How do you think I should accessorize and what colors should I use?

10 May 2013

I Despise White Trim

White trim. It's beautiful in theory. Like in these pictures:
From Flourish Design + Style
From Thrifty Decor Chick

But, do you know what it looks like after a few decades? Crap. That's what. And do you know that it is impossible to match the same stupid white color to touch it up so my husband and I the new owners have to repaint it all? Yeah, that's right. So don't paint. I'd far rather refinish wood than scrape, peel, sand down, paint, and double paint trim. Call me crazy.

Case and point.
I was actually worried we wouldn't get our USDA loan because of the chippy paint. But apparently our inspector wasn't too concerned. But that's a different story for a different day.
Thank goodness only 2 rooms in the whole house had painted trim, the sleeping porch and the little guest bedroom. We thought it'd be quick and easy. WRONG. But, after many hours (basically two full days) using some really bad Walmart paint (I won't do that again), it looks a million times better.

Plus pretty grey paint!
We did try to strip it, especially on the beautiful doors, but it was a fail. We weren't able get all the paint off without harming the wood even more, so we sanded as much as we could, primed it, and re-painted it. It's still a little rough and probably would've been better if we hadn't even tried stripping it, but thus is life.
Painfully shabby not-chic anyone?
So, the moral of the story is this: Don't paint the trim - refinish it. If you ever have painted trim, return to the house and help the owners fix it or give them a large sum of money for their troubles. That means you - previous owner of this Foursquare.


09 May 2013

Finally Here

After a snow storm on May 2nd, Spring is finally here - all 60° of it! :) Obviously the Magnolia tree is happy - the first blooms since we've lived here!

Pee Carpet

The title isn't pretty, but really it was carpet with stains... around the toilet. Gross. And it smelled. Are you noticing a theme?


Let's step back to July 18, 2012, the day we closed on our house. It was hot and late afternoon. Most people might start moving things in or just enjoying their new home. No, not us. Once the key was in our hand, we went inside, pulled up the remaining carpet in the house and drove it to the dump. And by we I mean Zach because I wasn't touching it.
Technically removing the landing carpet, but still the same day & time. Can you spot the bottle of bleach? Not kidding.

Now, we had a floor with weird linoleum covered in adhesive. Not pretty, but at least bleachable. I'd love to tear out that whole bathroom and make it beautiful... but we can't swing it yet. Plus, the flooring is connected to the kitchen, and I'd like to make it all flow. And we definitely can't swing the kitchen gut remodel right now.


"Help me, I'm poor."


So instead, we went to Mendards and found the cheapest floor tile we could to hold us over for a year or two (or three or four) until we can redo the whole thing. The hubs did this while I was away, and said  the peel and stick was pretty easy except for the cutting. But I think it looks a-okay for a $15 dollar job. 

Seriously ugly vanity. Can you see the "distressing"?
Again, not the tile style I eventually want, but it is at least presentable now! And bleachable.

08 May 2013

Dresser to TV Stand Transformation


Remember on Monday when I gave you a tantalizing view of the original dresser and harrowing tale of acquiring it? (If you don't it's here.)

Today we'll move on to part deux!

First things first - once I decided to get my butt in gear and work on it, the hubs moved it out of the garage, removed all the drawers, and used the shop vac to clean it. Fair warning, things you find sitting on the curb for free might have a million few cobwebs.

Before
Then, I stole my husband's got out my trusty screwdriver and took off all the pulls on the drawers. A few of the screw holes were mangled up\

We used the cheaper Ace brand - worked great!
Next, I used a hand sander to take of the shiny topcoat. The good news is the dresser had very little varnish, but was actually really well constructed and heavy duty - dove-tailing and everything!

As I was sanding I noticed all of the nicks and dings on the body and drawers. I got out some wood filler that we had been using on the refinishing the floors and filled in the holes. It was pretty simple to use and dried in about 15 minutes - I'm impatient enough! After it dried you have to sand it down again to make it smooth with the surface. I also used it to fill in some of the original holes for the pulls.

Finally, it was time for some paint! After reading a few how-to's (here, here, and here) I decided I should prime the dresser first. I used the basic white Glidden primer from Walmart on my dresser. I'm not sure how much of a difference it made with the appearance of the dresser, but hopefully it will to stand up to more wear and tear over the long haul.

Can you see my paint tray? Check out the aluminum foil -
it makes clean up and storage really easy!
To prime and to paint, I used a four inch trim roller along with a 1 1/2 inch brush. The trim roller is my new favorite painting tool for furniture. It reached almost all of the places I needed it to and I just followed it up with the brush to get in the tight spaces.

I used Ace brand paint - we're cheap - for the dresser, and let me tell you - it is so much better than the  Walmart brand! The color I picked was called "Going My Way" by Clark + Kensington Paints in semi-gloss. I put three thin layers of paint on it to get full and solid coverage. And no, Ace doesn't support me in any way, we just really like their store  and service.

The hubs was brave, especially considering this is a giant piece of furniture that will be pretty prominent in our house, but I think it paid off! Hopefully you'll agree too. Come back on Saturday for the final reveal!